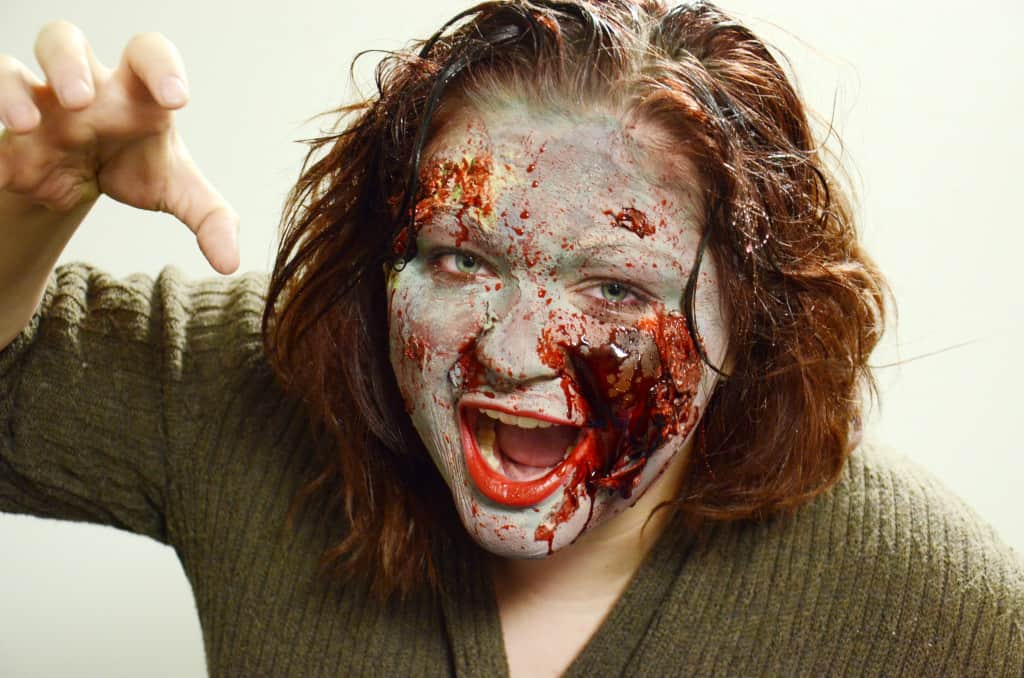
A zombie is the perfect way to encompass serious Halloween vibes, it can be as scary or as gross as you want it to be. You could be a recently-turned zombie, or a full-blown, rotting face zombie. It’s all up to you! We went full-blown, face rotting zombie.
Turn some heads, and probably a few stomachs, with this fun + freaky zombie tutorial!
What you’ll need:
- Latex
- Halloween makeup
- Fake blood
- Oatmeal
- Tissue
- Cosmetic sponge
- Brushes (the ones that come with your makeup kit)
- Popsicle sticks
- A stick or toothpicks to tear the latex

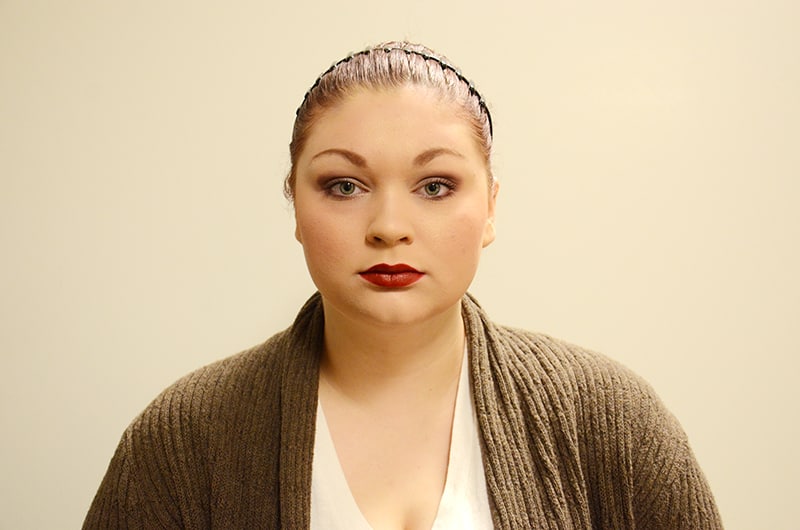
Here’s our beautiful model before. (I promise she’s excited to get zombified ;))
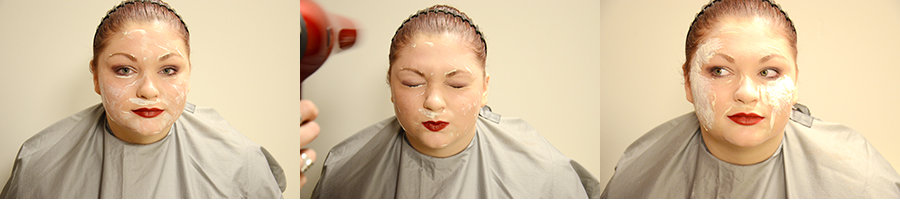
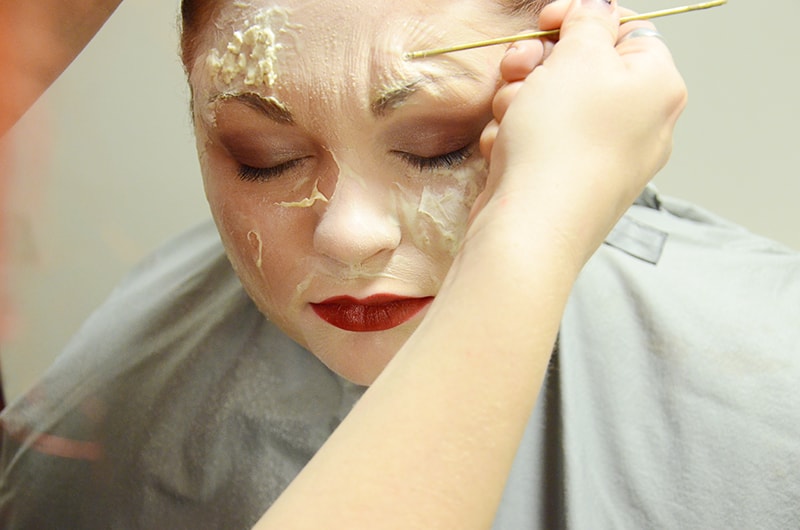
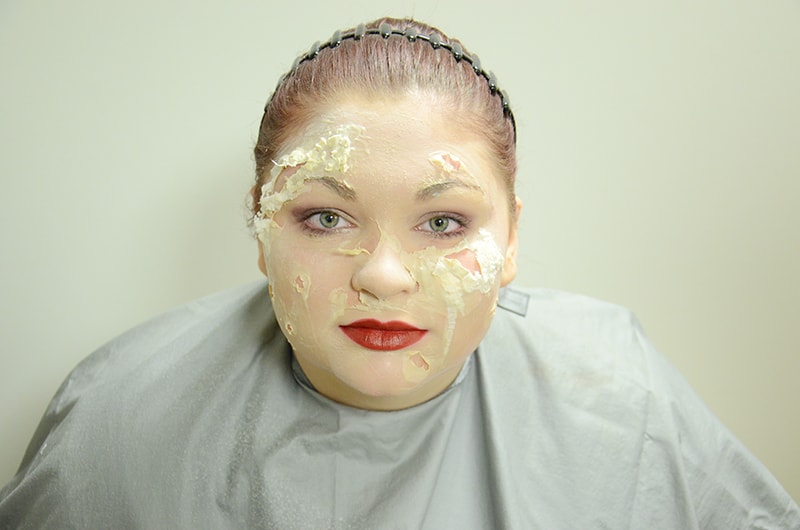
Creating a zombie is just like building a house. Well, kinda. What I mean is, you have to start with a foundation. For this look, we used three layers of latex and oatmeal.
- Apply your first layer over your entire face and blow dry. Make a scrunchy face while drying to get the desired lines and wrinkles.
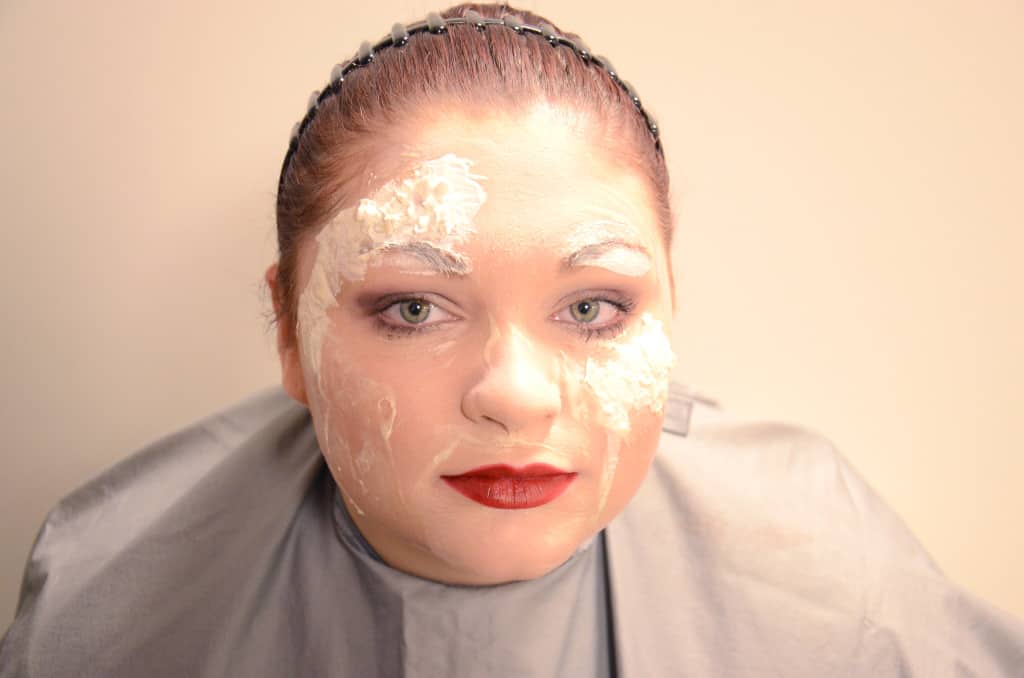
- Apply your second layer of latex, focusing on the areas you want to rip/tear to give the look of rotting flesh. Apply a few strips of tissue paper/toilet paper with jagged edges to look like skin is peeling back. I did this on her cheek. Blow dry with a scrunchy face.
- Mix in dry oatmeal with the remaining latex and apply to any areas you want to look infected. I applied right above her right eyebrow.
Now that your foundation is complete, it’s time to create the tears in your “flesh”. To do this, grab a toothpick, or the end of one of your makeup brushes, and begin tearing the latex. CAUTION: Be careful to not scratch your skin.
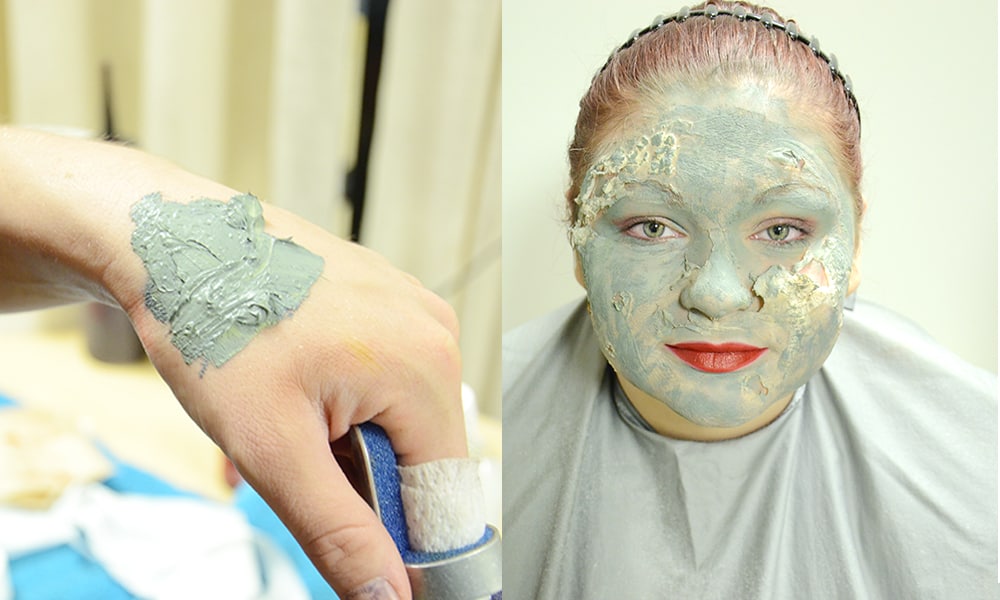
Now comes the fun part! First you need to decide on a back story for your zombie look to decide what type of coloring the skin will have. A fresh zombie will have more flesh tones and blood, a really infected zombie will be green and yellow, sunken in cheeks will be gray or black. It all depends on wounds and decomposition of the skin. We went for a greenish-purple zombie. First, we mixed a tealish green with a normal green to get the color below. Once you have a color you want, apply your first coat. Now, go in with any accent colors to give dimension. We chose purple.
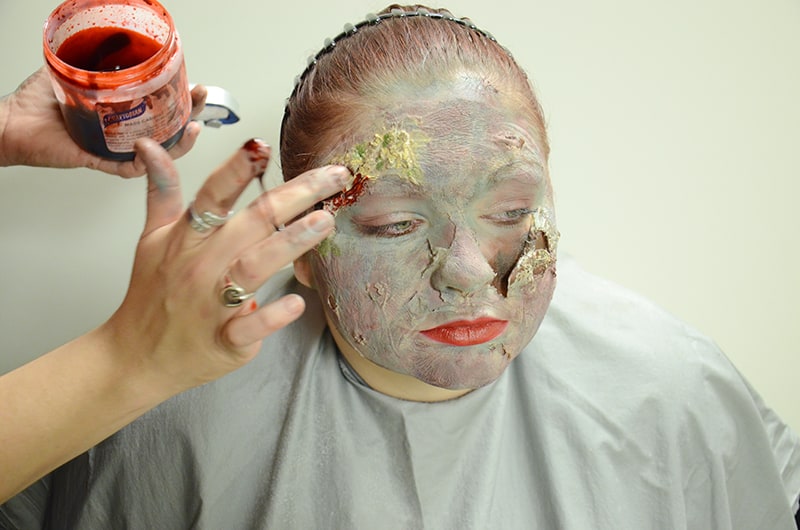
Once you’re pleased with the color, add blood! I started on the sores above her eyebrow and worked my way to the massive tear on her cheek, applying blood where I wanted. You’ll want to fill in the deep areas (like the tear on her cheek) with black and layer in the deep reds.
Once your makeup is how you want it, make your hair greasy and gross and you’re a flesh-eating zombie!